

If you’ve been eyeing that boho, plant-filled look on Pinterest and wondering how everyone gets their pothos to float so beautifully across a room, macrame is the answer. A macrame plant hanger is one of the easiest ways to bring texture, warmth, and a little handmade charm into a space, and you genuinely do not need any prior knotting experience to make one yourself.
This guide walks you through the entire process step by step, plus what to know about styles, sizing, and hanging your finished piece safely. And if knot-tying just isn’t your thing this week, we’ve also rounded up a few ready-made options worth buying instead.
This post contains affiliate links. As an Amazon Associate, I earn from qualifying purchases, at no extra cost to you.
What You’ll Need (Macrame Plant Hanger Supplies)
The supply list for a macrame plant hanger is refreshingly short. You really only need three things to get started: cord, a ring, and a pair of scissors.

Choosing Your Cord
Cotton macrame cord is the go-to choice for beginners because it’s soft on your hands, holds a knot well, and gives that classic textured look. A 3mm cord is a solid middle ground for a first project. Go thinner and your knots will look delicate but take longer to tie. Go thicker (5mm or up) and you’ll get a chunkier, more modern look with fewer knots needed overall.
As a general rule, cut each cord to about four times the finished length you want. So if you’re aiming for a 4-foot hanger, you’ll want roughly 16 feet of cord per strand.
Rings, Hooks and Beads
You’ll need a small metal ring, around 1.5 to 2 inches, to gather your cords at the top. Wooden or metal beads are completely optional but add a nice boho detail if you want to dress up a simpler knot pattern.
Skip the Prep Work: Pre-Made Macrame Kits
If measuring and cutting cord sounds like more prep than you want to deal with, a pre-cut macrame plant hanger kit takes care of that step for you. Most kits come with the right length of cord already portioned out, a ring, and sometimes beads, so you can skip straight to knotting.
How to Make a Macrame Plant Hanger Step by Step
Once your supplies are ready, the actual knotting comes together faster than most beginners expect. Give yourself about an hour for your first attempt.
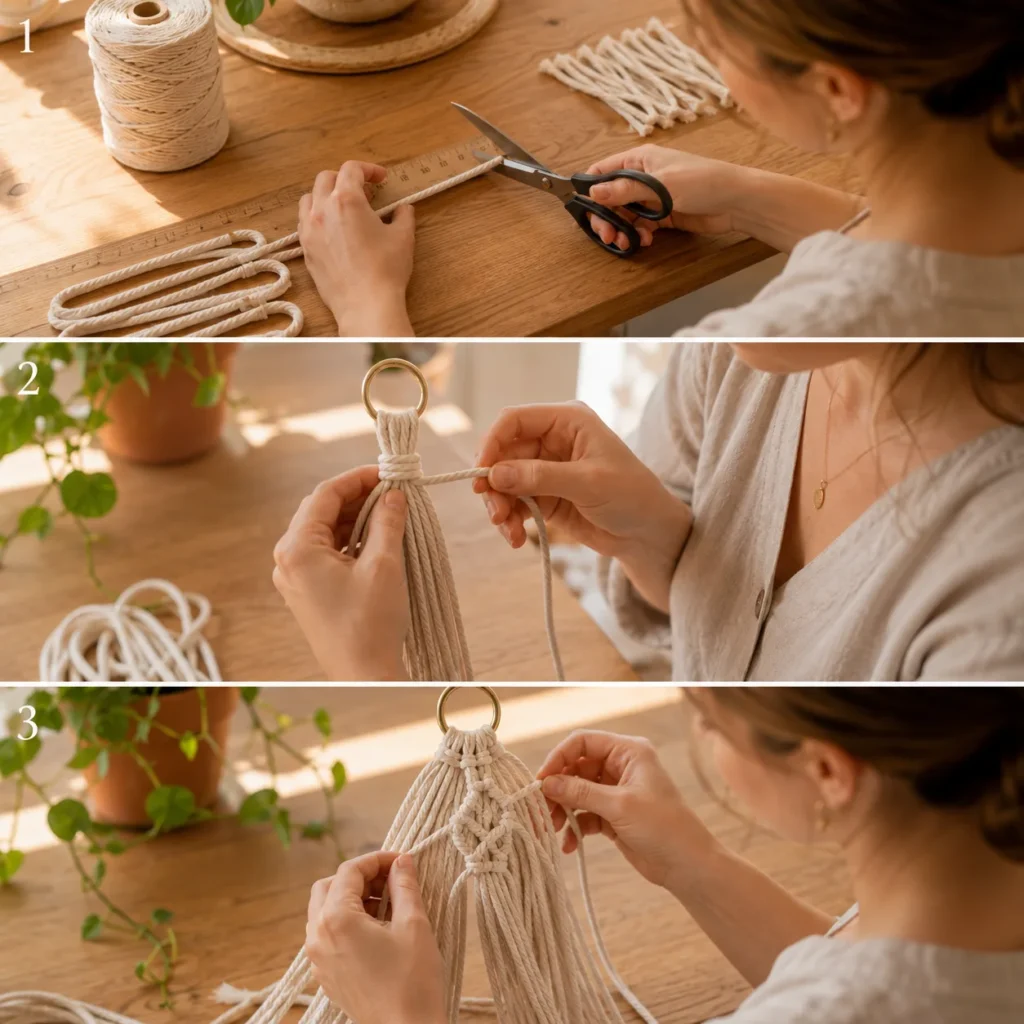
Step 1: Cut and Fold Your Cords
Cut eight cords to your desired length (remember the four-times rule above). Fold them in half so you have a center point on each strand.
Step 2: Attach to the Ring with a Gathering Knot
Feed the folded cords through your ring so the center point sits against it, giving you 16 strands hanging below. Take a separate shorter piece of cord and wrap it tightly around the top of the bundle several times, then tuck the end through the wrap to secure it. This creates a clean loop at the top that holds everything in place.
Step 3: Tie Your Square or Spiral Knots
Divide your 16 strands into four groups of four. Working one group at a time, tie either square knots (alternating sides for a flat, woven look) or spiral knots (working from the same side each time for a twisting effect). Continue for 6 to 8 inches, or until it feels proportional to your ring size.
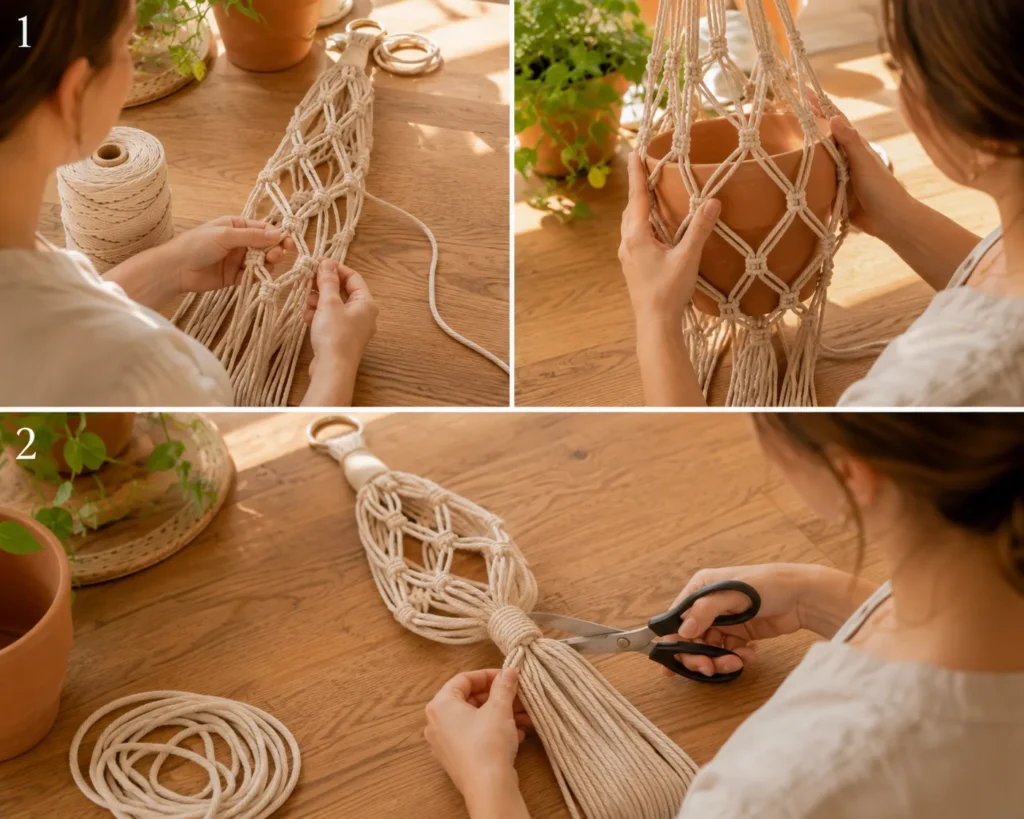
Step 4: Shape the Plant Net
This is where the hanger starts to take its basket shape. Take two adjacent strands from neighboring groups and tie them together with a square knot a few inches below your first set of knots. Repeat around all four sections to form a diamond pattern, then repeat once more a couple of inches lower to create the pot’s resting net.
Step 5: Finish and Trim the Fringe
Test-fit your pot into the net to check the sizing, then gather all the remaining strands and tie a final knot underneath to close it off. Trim the fringe to your preferred length, anywhere from a clean 4 inches to a longer, more relaxed 10-inch tassel.
Hidden Pro Tip: Most beginners cut their cord too short because they underestimate how much length knotting eats up. Always round up when calculating your four-times ratio, and keep a foot or two of slack per strand. It’s much easier to trim excess at the end than to run short halfway through.
How to Hang a Macrame Plant Hanger
A sturdy ceiling hook rated for at least 20 to 25 pounds is the safest way to hang your finished piece, especially once it’s holding a full pot of soil and a mature plant. For renters or anyone who can’t drill into the ceiling, an adjustable curtain rod or a wall-mounted plant bracket works nearly as well.

Before committing to a spot, hold the hanger up (or have someone help you) to check that the pot clears the wall and doesn’t crowd nearby furniture as the plant grows outward. Give trailing plants like pothos or string of pearls extra clearance since they’ll spread well beyond the pot’s original diameter.
Macrame Plant Hanger Styles Worth Knowing
Not every macrame plant hanger looks the same, and knowing the style categories helps you shop or design with more intention.

Vintage and 70s-Inspired Designs
Thicker cord, longer fringe, and warm earthy tones define this look. It’s the closest to the original macrame boom and pairs beautifully with rattan furniture and terracotta pots.
Boho and Beaded Styles
Adding natural wood beads along the knotwork softens the overall look and adds a bit of movement and texture. This style tends to feel a little more polished and works well in living rooms or entryways where you want a curated, styled feel rather than a purely casual one.
Wall-Mounted vs. Hanging Designs
Traditional hangers drop straight down from a ceiling hook, but wall-mounted macrame designs (sometimes shaped more like a flat woven pocket) are a great option for smaller rooms or renters who want the look without a ceiling anchor.
Sizing Guide: Mini, Small, Large and Huge Hangers
Mini and small hangers (under 3 feet) work well for single air plants or a small succulent and are ideal for apartments or shelf styling. Large and huge hangers, often 4 to 6 feet, make more of a statement and suit taller ceilings or larger leafy plants like a pothos or philodendron. If your ceiling is on the taller side, a macrame extension cord lets you lengthen an existing hanger instead of starting over with more length than you need.
No Time to DIY? Best Macrame Plant Hangers to Buy
If you’d rather skip the knot-tying altogether, plenty of ready-made options capture the same look without the hour of prep work. Here’s how a few common styles compare.
| Style | Price Range | Best For | Buy on Amazon |
|---|---|---|---|
| Classic Cotton Hanger | $12 to $18 | A simple, versatile look for any room | Shop the classic style |
| Beaded Boho Hanger | $15 to $20 | Adding texture and a polished, curated feel | Shop the beaded style |
| Extra-Large Statement Hanger | $20 to $25 | Taller ceilings and larger leafy plants | Shop the large style |
| Wall-Mounted Woven Pocket | $15 to $22 | Renters or smaller spaces without ceiling access | Shop the wall-mounted style |

Where to Use a Macrame Plant Hanger in Your Home
Macrame hangers work almost anywhere you have decent natural light and a little vertical space. Near a bright window is the obvious choice, but they also do wonders in an empty corner, above a reading nook, or clustered at different heights along a blank wall for a fuller, layered look.
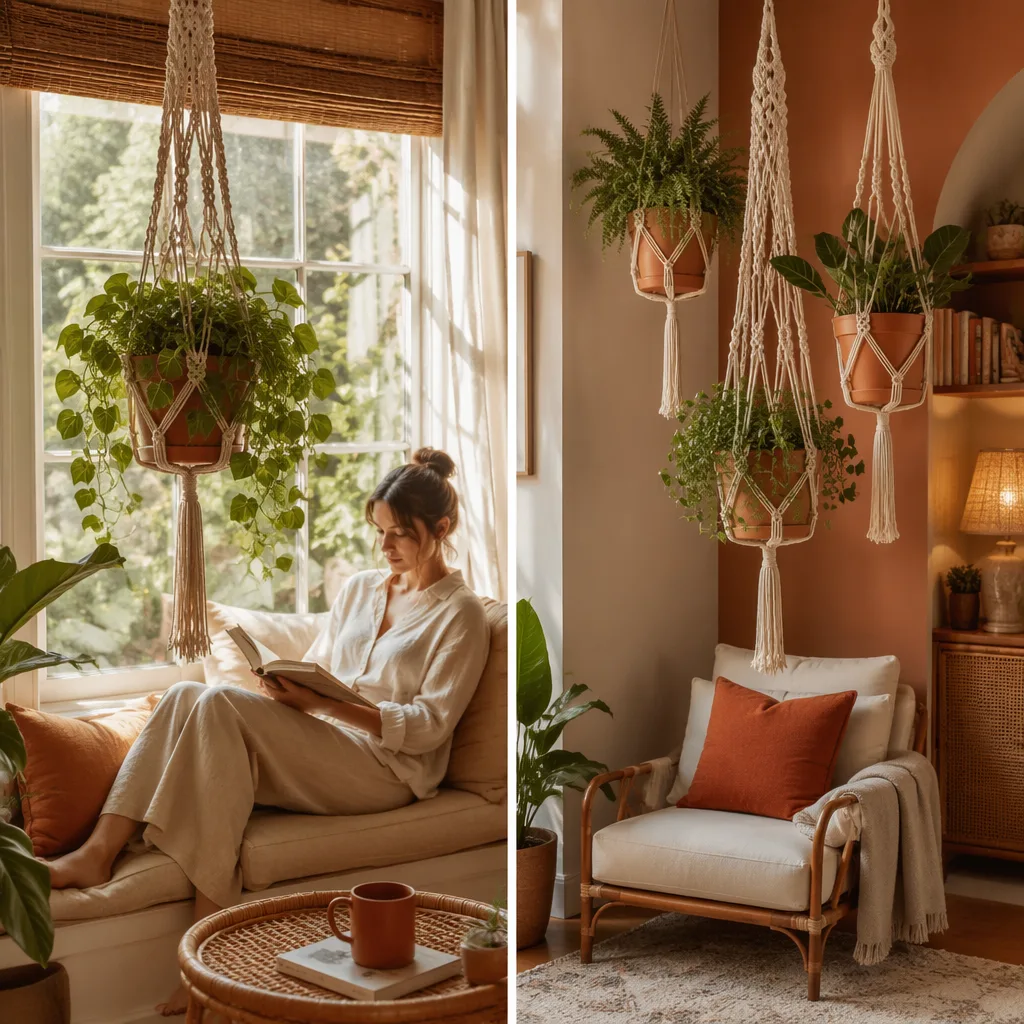
For small spaces, hanging plants are one of the smartest ways to add greenery without giving up floor or shelf space, which pairs naturally with our guide to indoor plant styling ideas if you want more ways to work plants into a tight layout. If you’d rather keep some plants at floor level too, our plant stand ideas roundup covers the best options for that.
If you have pets or young kids in the house, hang your macrame planter well out of reach of curious paws and hands, and double check that your chosen plant isn’t toxic if nibbled on. A slightly higher placement also keeps falling leaves and soil spills further from foot traffic.
Is It Worth Making Your Own?
A macrame plant hanger is one of the rare DIY projects that’s genuinely quick, cheap, and forgiving enough for a first attempt, and the finished result looks far more expensive than the few dollars of cord it actually costs. If you’re short on time, a ready-made option gets you the same look in minutes. Either way, it’s a small addition that adds real texture and warmth to a room, and it’s one of the easiest ways to bring a plant into a space that doesn’t have room for another shelf or stand.

FAQ
How do you make a macrame plant hanger?
Cut eight cords, fold them through a ring, secure with a gathering knot, then tie square or spiral knots in sections before shaping the bottom into a net to hold your pot.
How do you macrame a plant hanger step by step?
Start with the gathering knot at the ring, work your decorative knots down each of the four sections, join the sections into a diamond-shaped net, then finish with a closing knot and trimmed fringe.
What’s the easiest knot for a beginner?
The square knot is the most beginner-friendly. It’s simple to learn, forgiving if you make a mistake, and forms the base for most other macrame patterns.
How do you hang a macrame plant hanger safely?
Use a ceiling hook rated for at least 20 to 25 pounds, or a wall-mounted plant bracket if you can’t drill into the ceiling. Always test the anchor point before adding a full, watered pot.